
THE THIRD LAYER
Many, many years ago, right
after high school, I worked as a secretary/office manager. One of my tasks was to type up
documents for my bosses. This
entailed having to read their writing.
I’ve got to tell you, this was no easy feat. The handwriting, in many cases, was terrible. So much so, that I would need to
continually ask the originator of the document to read it to me. How crazy is that, and what is the
point of writing if no one can read it?
Writing beautifully is easy.
Sit up straight, put your forearm on the table on a 45 degree angle, and
instead of moving your fingers while you write, move your whole hand and
forearm while pressing lightly on your pencil. I have taught many terrible scrawlers how to write and it
has changed their world. Give it a
try. You’ll see.
The prompt for this week’s
journal page is below. After you
have read it, start writing. Write
anything that comes to mind. Keep
writing until you can’t think of anything to write about. Draw pictures if you feel like it. Write large/write small. Decorate your letters. Vary the style of writing. Print or write cursive. It doesn’t matter as long as you are
writing. Don’t worry that someone
else is going to read what you have written. This is YOUR journal.
YOUR own thoughts. Be
honest and be real. There is no
reason why you couldn’t go back later and continue to write. You’ll find out how freeing journaling
is if you haven’t already.
Once you have exhausted your
ideas in terms of the prompt, try picking out important words and highlight
them by tracing (bad word in art) over them with the same writing tool you have
been using, or use a different color, or thicker/bolder tool, or highlighter,
or rewrite, and overlap them using a stencil, cut out magazine/newspaper/book letters,
stencils, yarn/string, letter stickers, or a label maker. When you emphasize words of importance
it will help you to remember them and it makes it easy to remind yourself of
what you wrote when you look back on your pages. You may even want to type your thoughts on your
computer. If you go this route,
many fonts, colors, and sizes of letters are at your disposal. Check out 1001 Free Fonts on the
web. I like the idea, however,
that you use YOUR handwriting.
This is your journal, about you, and your handwriting is just another
part of you that makes you unique.
You may also want to
de-emphasise some words. Write
them small, put a glaze over them, put a piece of tissue paper over them,
scratch them out, put a piece of paper on top (possibly with another word that
you prefer). The greater variety
you use when writing your thoughts, the more interesting your page will
be.
The writing in your journal
can be done any time you are working on your page.
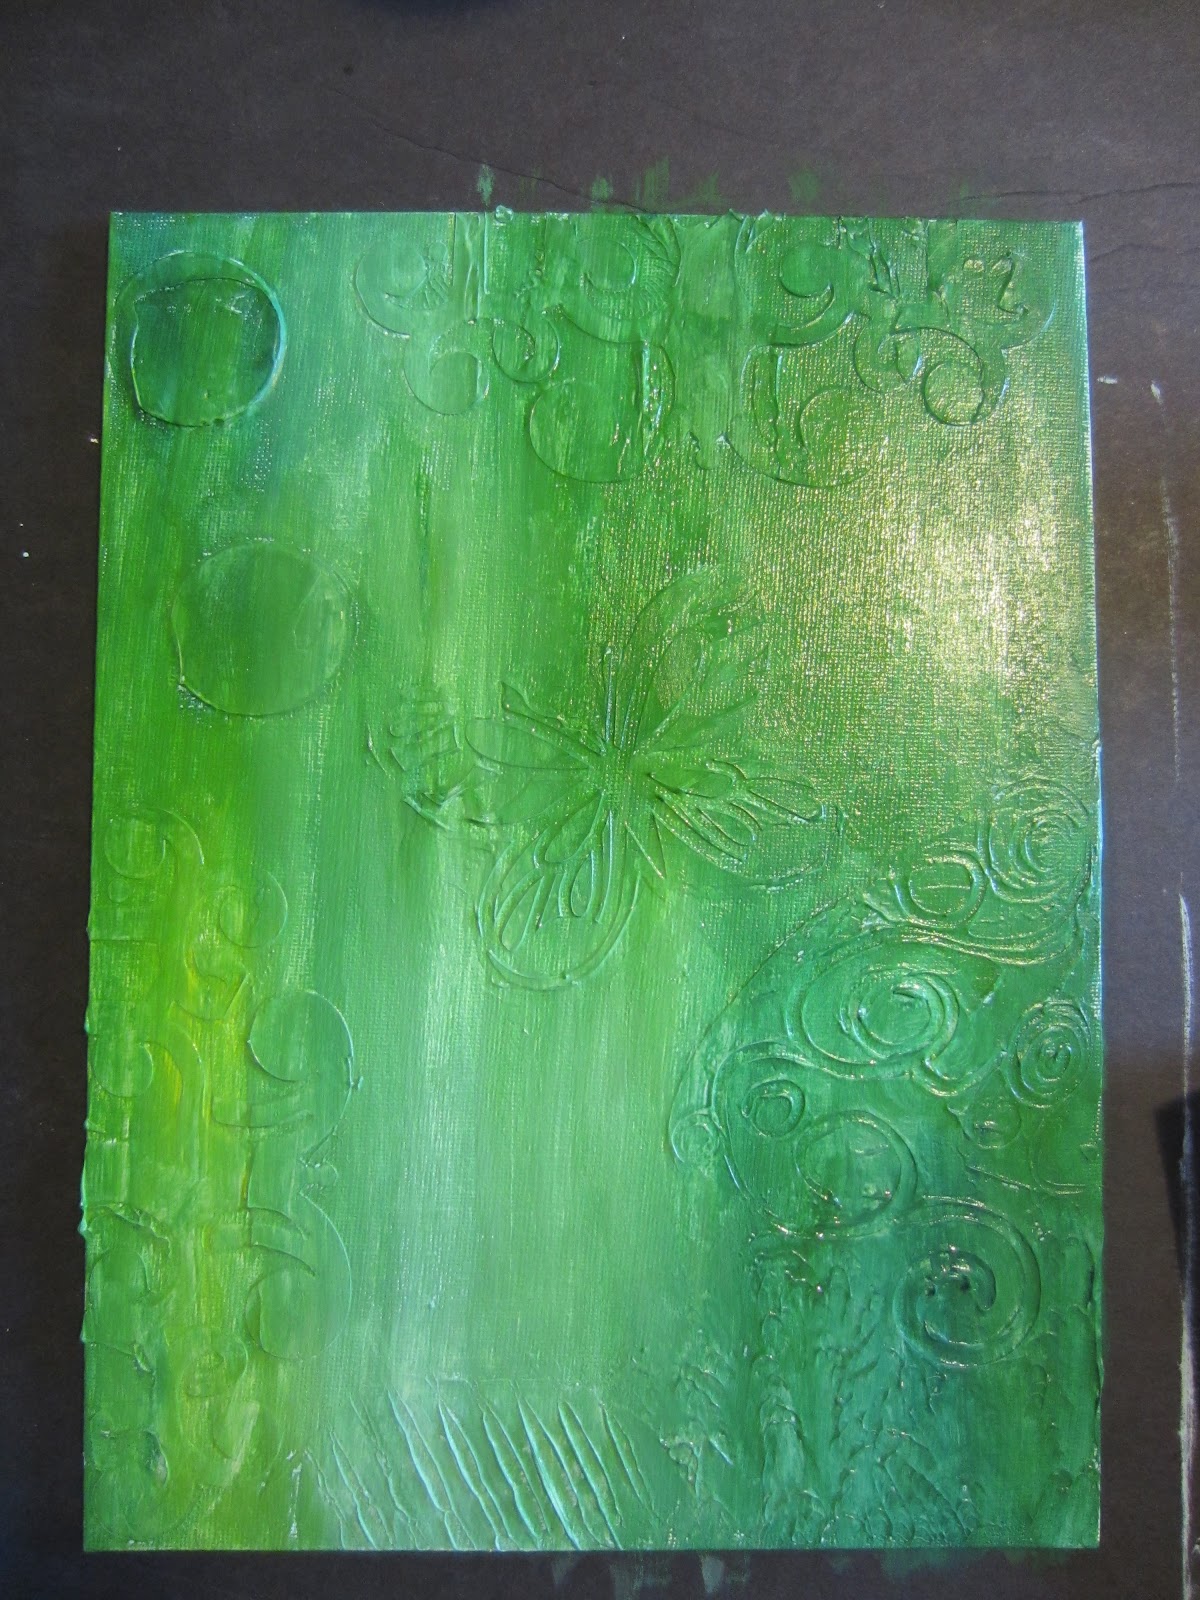
I decided to use my modeling
pasted page from last week for this weeks demonstration. I started by adding paint over the
whole page. Choose colors that you
like. You can drag paint as seen
in the last blog, or use your brush and blend your colors as you go. Once a base coat has been added, go
lightly over the top of the raised portions of your page with a contrasting
color. If your base color is dark,
you might want to use a light color on the raised portions, or if your base
color is light, you may want to use a dark color on the raised portions. I suggest that you use a piece of paper
towel or a flat brush to gently catch the ‘hills’ on the page. Not a lot of paint is required on your
paper towel or brush. If using a
brush, turn it to a 90 degree angle to your page, and with little paint, gently
graze the hills. I used several
colors of paint on my hills until I was happy with the look. Make sure that paint is dry between
each layer or you will end up with mud.

I then used nail polish,
stamps (including a wine cork, lids, and legos), buttons, stencils, paint, and
glitter to add more color, texture, and interest to my page. I love color and brightness, and I find
that nail polish, glitter, metallic paint, and gloss helps me to achieve
this. As an aside, nail polish is
great to use on metal objects as well.
It sticks!
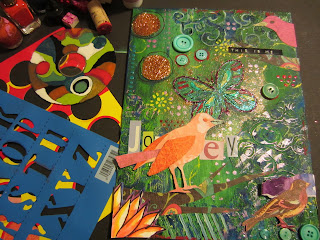

What about images? Do you have some artwork that has been
sitting around for a while that you can use? Of course you can find all sorts of interesting images in
books, magazines (bird in lower right corner of my page), newspapers, and the
Internet, but let me also encourage you to draw. I have used many methods in teaching students how to draw over
the years but this is the easiest and most successful method by far.
Find yourself an image. It is always best to have the image you
are wanting to draw in front of you.
Unless, of course, you have a photographic memory which allows you to
recall detail. I have chosen a
bird, but you get to choose what you want on your page. It doesn’t matter what you draw, these
steps will bring you success.
Start by looking at your
image. What geometric shapes do
you see? In the bird, I see an
oval for his head. So I draw an
oval (1). Then I look at his body
and I see another oval. So I
measure the head on my image. With
that measurement, I determine how many heads make up the body of the bird. For my image, it was approximately
three heads make the body.
THIS IS REALLY
IMPORTANT. I then measure the head
(oval) that I just drew and use that measurement to count three heads for the
body. If you use the measurement
of the IMAGE on your drawing it will be wrong. You need to use the measurement of the head you drew in
order to measure the body (oval) that you will draw (2).
The head, in drawing terms,
is your basic unit. You will use
this basic unit to measure every part of your image. You will ask yourself, “how many heads make the tail”, “how
many heads make the wing”, “how many heads make the beak”, and so on. Everything you draw will be drawn in
relation to your basic unit (head).
How many of your head makes
your body? 7 heads? 8 heads?
His tail (4) (…don’t asked me
what happened to number 3) is shaped like a triangle, as are his wings (5 and
6). Oh, and yes, so is his beak
(7). Then his legs and feet are a
combination of triangles and rectangles (8).

Once you have all of the
geometric shapes placed, then it’s time to LOOK at the actual image and see the
outline of it (the contour of it).
Adjust and tweak your geometric shapes (lines) until they resemble the
actual image.

You can, at this point, if
you wish, add as much or as little detail as you want. Erase all of the lines you don’t need.
Cut out and glue your drawing
to your page. I prefer to use a
product called ‘Art Glitter’ (no glitter in it) to adhere items to my
page. What I like about it is it
holds quickly unlike white glue.
I actually wanted to cut my
bird out of decorative paper. I then
am able to put my drawing aside for future pages. I like paper, and there are so many choices available to
you. I turned my drawing over and
scribbled behind my drawing with charcoal. You can also use pencil or pastels for this part. This becomes your carbon allowing you
to flip your drawing right side up and trace (bad word in art) your drawing
onto a decorative piece of paper.


You can get as detailed as
you want. I could have cut
feathers out and made it more dimensional but I liked the look of the way it is
right now, and decided not to go any further.
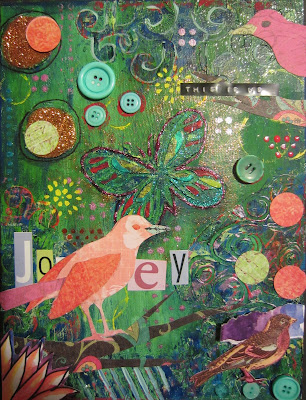.jpg)
AS AN ARTIST YOU CAN DECIDE WHEN TO STOP. IF YOU BELIEVE THAT ONE MORE THING ADDED TO YOUR ART WOULD WRECK IT…IT’S A GOOD TIME TO STOP!
.jpg)
AS AN ARTIST YOU CAN DECIDE WHEN TO STOP. IF YOU BELIEVE THAT ONE MORE THING ADDED TO YOUR ART WOULD WRECK IT…IT’S A GOOD TIME TO STOP!
I like my finished page. It rocks!
PROMPT
Here is your prompt for this
week. Remember, if it doesn’t
apply to you, you can speak about it in general terms, or in terms of someone
else that you know.
TIME TO CHANGE THE CHANNEL?
Do you find that you tell
yourself that you are not enough, that you don’t measure up, and that you are
incapable? Listen to yourself
throughout the day. What lies are
you telling yourself over and over again?
It’s time to change the channel.
When I was growing up there
were so many people telling me that I wasn’t good enough. I was too tall, I wasn’t pretty, I was
hated, I was stupid, I was weird and different, I was limited in what I could
accomplish, I was destined for a humdrum, center of the road, existence. The sad part is, is that I believed
what everyone was telling me. I
believed that everyone was better than I and that I would not amount to
anything. I allowed those lies in
and allowed them to shape and form me.
Truth be known, you or I
wouldn’t dare treat anyone we cared about the way we treat ourselves in our own
heads. Would you say these things
to your child, your spouse, or your friends? Give yourself a break and change the channel.
I have found that this is not
an easy task, and I still struggle with it daily. But I do know the truth now, and when I catch myself, I
quickly face the lies head on and toss them out and replace them with truths.
The truth is that you are
good enough. This doesn’t mean
that you shouldn’t be growing and bettering yourself constantly, (life isn’t over
yet), but where you are at any given moment in the day is absolutely fine. You are good enough friend…you are good
enough.
I encourage you to remove
your negative talk and shower yourself with praises and affirmations every
day. You are meant to be, you have
every right to be here, and you are making a positive difference in this
world.
Believe it or not, we really
do care about you.
But
Jesus turned her about, and when he saw her, he said, Daughter, be of good
comfort; thy faith hath made thee whole.
And the woman was made whole from that hour. Matthew 9:22
No comments:
Post a Comment